July 1st, 2014
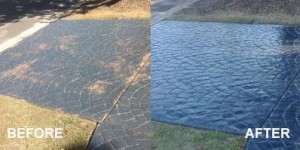
 A good sealer can help rejuvenate a tired looking driveway or will keep it looking great for longer. Whether it’s grey, coloured or patterned concrete, sealing after the concrete has cured is strongly recommended and for the best results, sealing should take place every few years.
Think of sealing as applying a layer of wax to your car, wearing sunscreen or spraying a fabric protector on your favourite shirt. A sealer can improve the overall look of a driveway, protect it from UV rays that cause fading and keep stains from absorbing. Some further benefits of sealing include:
While there are many benefits to sealing a driveway, finding the right sealer for the job at hand is crucial. There are hundreds of sealers on the market designed for concrete application, but no sealer is perfect for all projects. Get it wrong and a sealer can ruin an otherwise flawless driveway.
Determining the right sealer
 When purchasing a sealer for your existing driveway, there are a few questions you should ask:
1. How much sealer do I need? Generally, coverage rates for sealers are calculated by square footage. Take the overall square footage of your driveway and divide it by the coverage rate. If in doubt, buy more than you need incase you run into any problems.
2. Is the sealer compatible with the decorative surface? Check with the manufacturer to ensure it is compatible with your driveway surface.
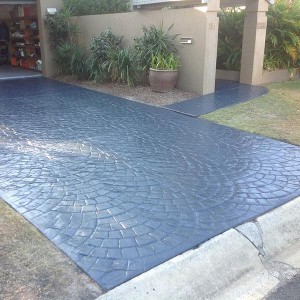
3. What conditions will the sealer be exposed to? A stamped concrete driveway will require a sealer that repels oil and grease stains and prevents penetration of water.
4. Is the sealer permeable? The concrete needs to breathe and allow moisture vapour to escape.
5. What is the drying time? Acrylic sealers dry the fastest, while polyurethanes and epoxies typically require curing times of more than 24 hours.
6. What type of finish do I want? If you are looking for a wet look that will enhance the colour of your driveway, a sealer with a medium to high gloss sheen is recommended. Solvent-based acrylic enhance colour better than water-based products. If no sheen is required, look for a matte or low-gloss finish. You may also want to consider the slip resistance of a sealer in high traffic areas.
How to seal a driveway
 Preparation is key when sealing a driveway and the process is a series of steps that result in a quality looking finish. You will need to:
Prepare the driveway. Treat existing stains with stain removal and a scrubbing brush, and then pressure wash the entire surface. You will then need to the driveway to dry for at least 48 hours. This may mean you’ll need to check the weather forecast too.
Treat concrete seams and edges. Start by applying sealant to the edges of seams and the sides of the concrete pad using a paintbrush.
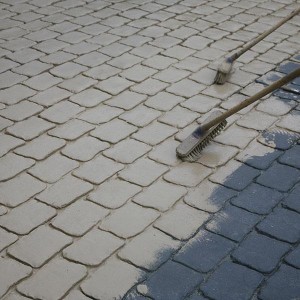
Roll on the sealant. Once the edges are done, pour the sealant into a paint tray and roll the sealant across your driveway. Work from the middle to the outer edge and always aim for maximum coverage. Remember also that less is more and it’s important the sealer doesn’t puddle or become too thick in certain areas. Try for two thin coats.
Allow sufficient drying time. After all your hard work, the last thing you want is to drive on the surface before it has fully dried. To ensure you don’t damage the surface, stay off your driveway for at least two days.